

Have you ever found yourself wondering how you could extend the longevity of your favourite fresh flowers? Well, this article about forever flowers art is the perfect guide for you. It’s a one-stop shop for everything pressed flower art, offering in-depth descriptions that curious beginners, hobbyists, or seasoned artists will find useful in creating spectacular designs.
This guide is designed for those interested in creating home décor, meaningful DIY wall frames, or starting an Etsy business to sell their preserved flower art.
What are Forever Flowers, and Why Does it Matter?
Forever flowering, or pressed flower art, refers to the process of drying fresh flowers and then pressing or flattening them. This process often involves the entire flower including its petals and leaves, although you can also use only the flower head if desired.
The drying and pressing processes typically draw out moisture from the flowers while protecting them from light exposure. Due to the flowers being kept in dark, cool areas during the drying and pressing period, they can preserve their colour and beauty for prolonged periods.
Forever flowers are a gem for hobbyists and decor lovers alike. Their most prized benefits are their longevity and ability to retain their look. They offer many ornamental uses and serve as a way to explore your creative skills. You can use pressed flower art to create all types of crafts from beautiful wall or table-framed art to pressed flower mason jar lanterns.
Additionally, you can also use forever flowers for educational or documenting purposes, including teaching young learners about different flower types available in their area or using them to document the flowers you are growing. Preserved flowers allow you to track your flower garden’s evolution annually.
Forever flowers also play an unexpectedly important role in the documentation and preservation of history. For example, a floral bouquet from the grave of Abraham Lincoln that was preserved in 1865 currently exists in the collection of a museum in Cleveland, Ohio in the United States. Not only that but pressed flowers thousands of years old have been found in the tombs of ancient Egyptians.
Today, you can find millions of pressed flower specimens in various prominent herbarium museums across the globe.
Forever flowers offer an engaging way to explore art and science by examining element interactions through various flower pressing techniques.
Where To Source Your Flowers
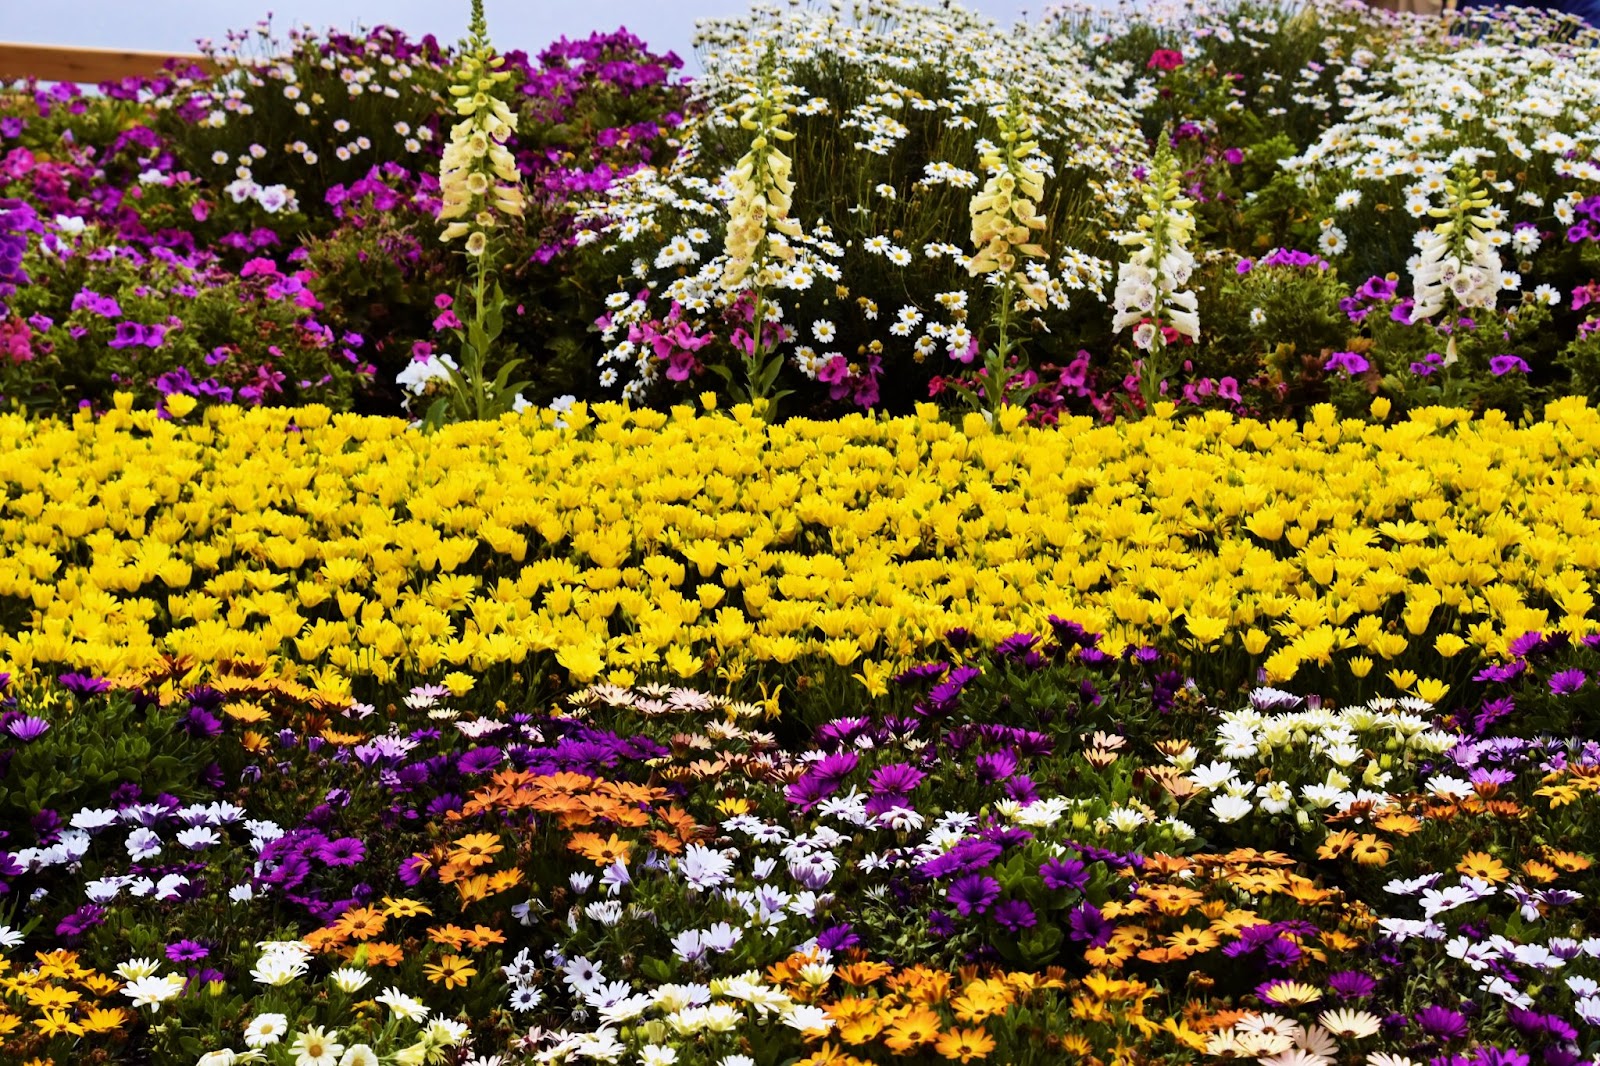
Pressed flower art uses everyday regular flowers. So, you can either source your flowers from a flower garden if you have one or purchase them from a florist shop. After all, freshly cut flowers offer the best results when it comes to pressed flower art.
The best time to harvest flowers from the garden is in the afternoon. This time of day offers you the best specimens because you don’t have to worry about excess moisture that typically accumulates on flowers from the morning dew. This also applies to harvesting flowers too soon after watering them. Excess moisture causes the process of drying to take longer, and the likelihood of flowers retaining moisture after drying increases. This, in turn, reduces the longevity of your forever flowers while increasing the risk of mould build-up.
Important note: If you plan on sourcing wildflowers from a public space, be mindful of following the area’s rules and guidelines in doing so to prevent picking flowers that are rare or endangered.
The best blooms for forever flowers are usually smaller, single-petal layered varieties, such as tulips, cosmos, delphiniums, and perennial geraniums, to name a few. Here’s a standard list of excellent fresh flowers for pressed flower art:
- Chrysanthemums
- Pansies
- Wild roses
- Pink miniature roses
- Virginia bluebell tulips
- Forget me-not
- Viola
- Calendula
- Vincas
- Esperanza
- Daisies
- Dandelions
- Coreopsis
- Borage
- Larkspur
- Zinnias
A great, worry-free place to source some of these flowers is Flowers Across Melbourne. You can find colourful daisy species, such as gerberas, and a wide selection of roses.
While you can also use thicker flowers, they are not the best varieties for pressed flower art. Flowers with thick or multiple layers of petals usually have high water content and more petals to dry, which increases the risk of them becoming damaged or mouldy.
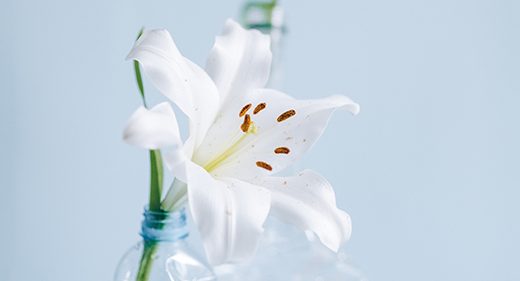
Thicker and larger flowers may also be cumbersome to incorporate into your pressed flower art, like framed art. If you are inexperienced in the craft, you want to stay away from thick flowers, such as peonies, lilies, hydrangeas, impatiens, or large roses.
But, this doesn’t mean that thick flowers are unsuitable for forever flowering. If you have to use thicker flowers, you can cut them in half, dry them and press them separately. You can then reconstruct them if you wish to after they completely dry out.
Tip: If you choose to press thick or multi-layered flower petals, it’s good to research a little bit about them and carefully select the type of flowers to use. An example is the lily of the Incas, which is great for pressing but usually contains stamens with yellow pollen that will stain your art. Therefore, before pressing them, the stamens need to first be removed.
Now, let’s get started with the actual pressing…
How to Make Pressed Flower Art
You can make pressed flower art using a range of methods depending on the tools to which you have access. Below we cover a wide variety of techniques for different budgets and types of equipment, ranging from basic ones, such as books, to more complex tools like flower press kits.
Method 1: Using a Standard Store-bought Flower Press
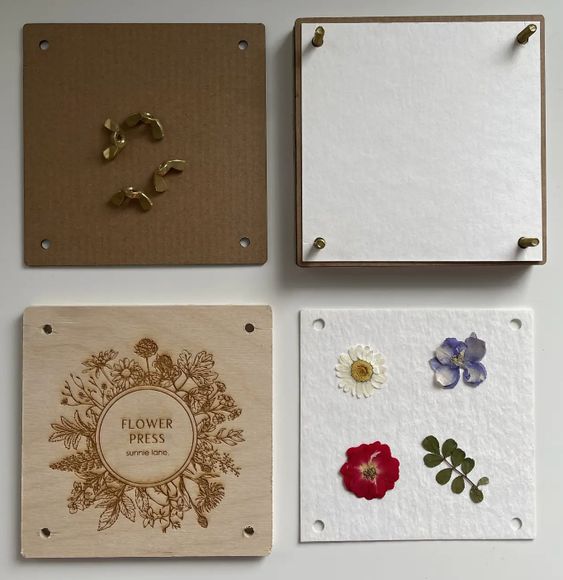
Traditional flower press machines are among the best tools for giving you great pressed
flower results. They are specifically built for this task and give you better control over the pressure you exert. This results in superior drying and pressing results.

You can purchase a standard press at any craft store or online. Alternatively, you can build one yourself at home. Most presses are made using wood boards, such as plywood, and contain corrugated cardboard that separates the layers of blotting paper placed over the flowers.
There are a number of different papers that can be used in flower pressing. Blotting paper, craft paper, plain white paper, or old newspaper are excellent options, thanks to their absorbent nature. They are efficient in pulling out moisture, thereby allowing flowers to dry out properly.
Newspapers also come with the added advantage of having natural anti-fungal properties, which eliminate the risk of mould build-up. Also, their lack of raised patterns ensures that they don’t transfer any unwanted designs to the forever flowers. This is why paper towers are less commonly recommended for pressed flower art. While the right paper towel ply offers much needed absorbency, most paper towels feature raised patterns that can end up on the flowers you are pressing.
Due to its superior absorbent nature, blotting paper comes at a higher price tag than other papers. But if you want cheaper options, white A4 paper or newspapers are the best alternatives quality. However, to enjoy similar results as with blotting paper, you may need to use at least 2 to 3 newspapers or plain A4 papers for every single blotting paper.
Note: Avoid using napkins or tissue paper as they are too thin and can easily disintegrate during the pressing process. Additionally, parchment or wax paper may cause flowers to develop mould, due to their ultra non-absorbent nature.
Materials Needed
- Store-bought flower press kit
- Blotting paper, plain white A4 papers or old newspapers
- Fresh flowers of choice
- Scissors or box cutters (if using newspapers – cut them to fit the size of the flower press’s cardboard base)
Step-by-Step Guidelines
- Make sure the flowers you want to use aren’t wet. Remove any residual plant matter that looks wet around the foliage or the petals.
- Place a few flowers (with or without their leaves and stems attached) on blotting paper and cover them with another piece of blotting paper. If you are only pressing the flower head without the leaves or stems, the flower head should be facing down on the paper.
- Place the blotting papers with the flowers on the cardboard base of the press.
- Repeat this step with as many batches/layers as your press allows. But, make sure you don’t stack the flowers too high up in the press. Doing so may prevent proper pressing.
- Once done, cover the topmost blotting paper layer with the top cardboard of the pressing kit.
- Adjust the pressure of the press using the wing nuts (usually four in total) on either corner of the press. Begin to gently press the flowers to remove any gaps or air. Let the flowers press.
- After a few days, continue to tighten the flowers by adjusting the wing nuts. Let the flowers dry out for up to three weeks for the best results.
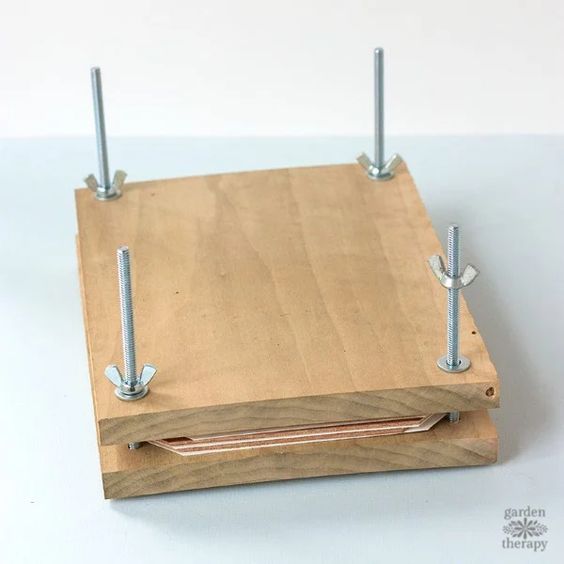
Method 2: Using a DIY Flower Press
Source: Pinterest
This method is a DIYer’s gift! If you want to get even more involved in the process, you can always build your pressing kit from scratch. The best part of building a press is that you can get all the tools needed from any home improvement or craft store.
In this particular method, you can opt for two main options based on how much you would like to get your hands dirty. If you want to build everything from scratch, you can start by cutting your own wood and dive into proper handyman mode by using power tools. Alternatively, you can buy pre-cut and pre-measured wood planks and jump straight into assembling them.
Materials Needed
- Two 12-inch by 10-inch wood planks (should be at least 0.75 to 1-inch thick each)
- Clamps
- Four 3/8-inch by 8-inch coach bolts (or round head square neck bolts)
- Four 3/8-inch wing nuts (or butterfly nuts)
- Ruler or tape measure
- Pencil
- Scrap wood
- Drill with 1/2–inch drill bit
- 80-grit Sanding paper
- Paint, paintbrush, and primer (optional)
- Large cardboard paper (1m x 1m)
- Blotting paper, plain white paper or old newspaper
- Fresh flowers of choice
- Scissors or box cutters
Step-by-Step Guidelines
- Gather your tools. If you’re using pre-cut wood planks, you can go straight to building a pressing kit. If you’re buying wood that hasn’t been cut, use a circular or power saw to cut each plank in the following dimensions: 12 inches in length, 10 inches in width, and 1-inch in thickness. Use a ruler or measuring tape to confirm the measurements. While this is the recommended measurement, you can always extend the length of your planks so that you can accommodate more flowers or longer flower stems.
- Now that you have your wood planks according to your desired measurements, mark all four corners of each wood plank using a pencil. But, don’t put the marks on the extreme edge of the wood. The marks are to be used as drill guides, so leave adequate space away from the edges. Make sure these guide marks are identically located on either plank.
- Stack the two planks on top of each other and clamp them together to enhance their hold and stability.
- Transfer the clamped wood planks onto a piece of scrap wood and use your drill machine to drill into the guide marks. Since the planks are identically marked, you can simply drill from the top plank into the bottom one.
- Once done, unclamp the planks and use the sanding paper to smoothen the edges as well as the newly drilled holes on both planks. Wipe off the debris and dust from each plank.
- If you want to give your press a cool unique look, you can paint and prime the two wooden planks in your favourite shade and with your own designs. After doing so, let the planks dry out completely before continuing with the project.
- Cut the cardboard using a pair of scissors or box cutters. The cardboard squares should be slightly smaller than the planks, allowing them to fit inside the perimeter of the drilled holes. You should end up with two pieces of cardboard.
- Cut the blotting paper into the same size as the cardboard squares. You can even use the cardboard as the pattern to cut the paper. Cut as many papers as possible.
- Layer the cardboard and a piece of paper on the bottom plank. Arrange the flowers (patted dry using paper towels) that you wish to press and cover them with another piece of paper. Repeat this step for as many layers as the press allows, being careful not to pack them in too tightly.
- Cover the final layer/batch with the top cardboard and secure the cardboard by screwing the coach bolts. Each bolt must fit into the bottom cardboard holes.
- Screw in the wing nuts onto each coach bolt and gently adjust the pressure by tightening the wing nuts, while being careful not to over-tighten the nuts.
- Let the flowers dry for up to 3 weeks, checking on them every 7 days.
Don’t get discouraged, though, if for any reason you can’t access some of the tools for building a DIY press. You can still build your homemade press using items that you can readily find around your home. And the good news is that it follows the same principles as a DIY one without utilising any of the technical items, such as bolts and nuts.
In the following sections, we share a few example guidelines of how to build a flower press using items that are typically available in your home or outdoors.
Method 3: Using an Improvised Homemade Flower Press
When building an improvised flower press, the goal is to achieve the stability and pressure required to press the flowers and harness the required results. Good examples of readily available items you can use include ceramic tiles held together by rubber bands, bricks (ideally larger building blocks to accommodate more flowers) and corrugated cardboard or a sandbox.
With Ceramic Tiles
If you want to press a smaller batch of flowers simultaneously, the best method to use is ceramic tiles. Unlike standard press kits, with this technique, you can accommodate no more than 3 batches at a time.
Materials Needed
- Two ceramic tiles (size according to your preference)
- Absorbent papers, such as blotting paper, plain white paper, or old newspaper
- Paper cutter or pair of scissors
- Fresh flowers of choice
- Thick rubber bands
- Clamps (optional)
- Weights, such as extra pair of ceramic tiles with rubber bands, an old telephone book, or a brick
Step-by-Step Guidelines
- Start by placing the absorbent paper on the smooth side of a single ceramic tile. Use a pair of scissors or a paper cutter to cut the paper so that it’s the same size as the ceramic tile or slightly protruding over the edges. Repeat this step to cut several more papers according to the number of layers that you will be pressing.
- Place the flowers you wish to press onto the absorbent paper, ensuring they don’t protrude over the edge of the paper or ceramic tile. Make sure to leave sufficient space between them for the drying process.
- Repeat step 2 for no more than 3 layers, while covering each layer with a piece of absorbent paper.
- Once done, cover the topmost layer with another piece of absorbent paper and then place the second ceramic tile over it. Ensure that the smooth side of the ceramic tile comes in contact with the absorbent paper.
- Use up to 4 or 6 thick rubber bands to gently hold the two ceramic tiles and their contents together. This will create the pressure needed for pressing the flowers. If you want to, you can add more pressure by adding clamps to the hold.
- Place the tiles in a warm and dry place and place extra weights, such as a thick book, to add even more pressure. Let the flowers dry for up to 3 weeks, checking for progress once every week.
With Building Blocks
Similarly to ceramic tiles, building blocks work best when pressing a few flower batches at a time. In this case, the issue is stability. Building blocks are usually narrow in design, so you don’t want to create a thick layer and risk the compilation toppling over. Multiple layers may also create air pockets that prevent effective drying.
Materials Needed
- Building blocks
- Corrugated cardboard paper
- Absorbent papers, such as blotting paper, plain white paper, or old newspaper
- Fresh flowers of choice
- Paper cutter or pair of scissors
- Clamps (optional)
- Weights, such as extra pair of ceramic tiles with rubber bands, an old telephone book, or a brick
Step-by-Step Guidelines
- Place a building brick on the ground or table in a warm and dry area and top it with a single cardboard.
- Line the cardboard with absorbent paper and layer it with the flowers you wish to press.
- Add another batch of absorbent paper with flowers for pressing if you wish to and finally place an absorbent paper atop the last layer.
- Cover the absorbent paper with another cardboard and gently weigh everything down with the second brick.
- Let the flowers press for about a week before checking on the progress. Add an extra building brick on top of the existing one for extra pressure and continue drying the flowers for another two weeks.
Exercise extra care with this method as it comes with a slightly higher risk of accidental injury, especially if you have little children or pets at home. Endeavour to place the press in an area that’s hard to reach during the flower-pressing period.
In a Sandbox
If you live in a sandy neighbourhood or by the beach, make use of your surroundings by using sand to press your flowers.
Materials Needed
- A bucket of dry sand
- Fresh flowers of choice
- Corrugated cardboard box
Step-by-Step Guidelines
- Fill a cardboard box with about one to two inches of dry sand. Make sure the sand is dry, as wet sand will cause the flowers to rot.
- Place flowers on the surface of the sand, leaving enough space between each flower.
- Once done, gently fill the box with another one to two inches of sand, completely covering the flowers, and then transfer the box to a warm and dry place.
- Let the flowers dry for about three weeks before removing them. To clean off excess sand from the now-dried flowers without damaging them, use a soft paintbrush and gently brush off the sand.
Method 4: Using a Book Press
Book pressing is another reliable method for forever flowering if you don’t want to deal with the complexities of bolts and nuts. In place of the complicated pressing kit, you simply use a thick book, such as an old telephone book or thesaurus.
Alternatively, you can use a book you intend to keep and read by adding blotting paper between each pressing page. This means that you are not directly pressing the flowers on the book pages but are instead placing them between the absorbent papers to prevent staining the book pages.
Materials Needed
- 2 or 3 old telephone books or any other thick books
- Absorbent paper, such as blotting paper, plain white paper, or old newspapers
- Fresh flowers of choice
Step-by-Step Guidelines
- Open the middle pages of your book and line the top and bottom pages with absorbent paper.
- Arrange the flowers you want in between the absorbent papers so that the flowers are covered on the top and bottom.
- Open another two or three immediate pages and repeat steps 1 and 2. For best results, arrange at least two to four batches only per book.
- Carefully close the book and place an additional one or two heavy books on top of it to weigh it down.
- Leave the books in a dry and warm place for the flowers for at least 3 weeks, checking on them every 7 days.
Combining Book Pressing and Heat
While this method may seem unusual, it is quite effective, especially for quicker results. After arranging your flowers in the book, don’t weigh them down; instead, load them into a microwave and run the microwave for about 60 seconds. Check your flowers after every 60 seconds and continue with this process until they are completely dry.
After this, transfer the book to a warm and dry place and let the flowers finish drying for the next day or two. The extra two days prevent the flowers from re-accumulating their moisture.
Method 5: Microwave Pressing
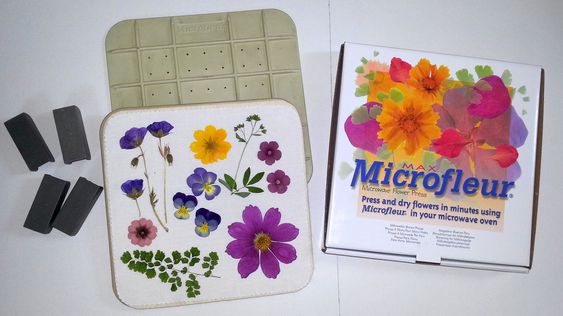
Speaking of using microwaves, you can opt for a pressing method that utilises a microwave together with flower pressing plates known as Microfleur.
Microwave pressing is pretty common among DIYers and you can even find specially designed plant-pressing microwaves available for purchase. It’s the perfect method for people who don’t want to spend weeks drying flowers and Microfleur are renowned for retaining flower colour.
If you go for this method, it’s a good idea to know how different flowers interact with the Microfleur. Microfleur is among the few tools that comfortably accommodate thicker petals, such as roses and lilies.
However, before pressing, it’s recommended to slightly dismantle the flowers into smaller pieces, or cut them in half, and to use bigger varieties of thinner or single-layered flowers because the smaller varieties easily stick to the Microfleur’s fabric liners.
Materials Needed
- Tap or distilled water in a spray bottle
- Microfleur (9-inch Max press or 5″ Regular press)
- Fresh flowers of choice
- Microwave
Step-by-Step Guidelines
- Spray the inner fill pack of the Microfleur with water to prevent scorching when you put it in a microwave.
- Add the flowers you wish to press in the Microfleur in the pattern you want, close the Microfleur, and clamp it to securely hold the flowers in place.
- Place the Microfleur into a microwave and run the microwave on high power for about 30 seconds.
- Continue running the microwave in several 10-second cycle intervals, while unclamping and opening the kit and removing it from the microwave for a few minutes for ventilation after each cycle. The reason why there isn’t a standard time for microwaving the flowers is due to the varying moisture content of each flower.
- Repeat step 4 until each flower has a dry and brittle feel. When you gently move the flowers, they should not droop, either.
Method 6: Iron Pressing
Wax or baking paper is generally not recommended for flower pressing. However, the exception is in iron pressing. A pretty simple and low-cost method, iron pressing only takes a few minutes.
Start by placing your choice of fresh flowers on wax or baking paper and covering them with another piece of wax paper or baking paper. Next, wrap the waxed papers with flowers around a thin piece of cloth.
The cloth provides a protective layer that prevents the iron from sticking to the papers during the pressing process. Place a warm iron on low to medium heat mode on top of the cloth-wrapped papers and let it sit for about 10 to 15 seconds. After each interval, check the flowers and continue the process until you are satisfied with their level of dryness.
Method 7: Oven Pressing
Technically, oven pressing doesn’t involve the actual pressing process. Nevertheless, it is a pretty effective and quick way to press or dry your flowers. Oven pressing is also an ideal option for DIYers who really want to experiment with thicker or multiple-petaled flowers, such as chrysanthemums or either pink or white carnations.
All you have to do is preheat your oven to 37.8 degrees Celsius and leave the oven door slightly ajar to allow moist air to escape. Meanwhile, arrange the flowers you want to press on a cookie sheet, leaving adequate space between each flower.
Transfer the flowers to the oven and turn them every 15 to 20 minutes to ensure even drying. The biggest risk that comes with this process is the burning of delicate flowers – so never leave them out of sight during this process.
Once satisfied that they are all fully dry, turn off the oven and remove the flowers from the oven.
A crisp and brittle appearance is a good indicator of appropriate dryness. Allow them to cool down and use them for your pressed flower art.
Which Forever Flowering Method Do I Use?
All pressed flower methods are just as effective when done right. However, you may need to pick and choose in some circumstances. For instance, if you want to create framed pressed flower art with an overlapping pattern, it is best to go for a method that uses plain white paper as an absorbent paper. This allows you to arrange the flowers in the ideal pattern before starting the drying process. The PVA glue you use later will simply help you hold them in place indefinitely.
On the other hand, methods such as sand pressing or using a DIY press are ideal for when you want to get more creative or would like to save a few dollars. If you don’t want to spend too much time on the art, go for accelerated methods, such as microwave pressing via Microfleur.
Pressed Flower Art Uses

Typically, after three weeks or so of pressing, the flowers should be dry. Now, this is the most exciting part of forever flowering art. This is when you can use your pressed flowers to create the art you want. The most common form of pressed flower display is framed art.
To create framed pressed flower art decor, remove the dried flowers from their drying papers with the use of chef tweezers to prevent damaging them, then use PVA glue to paste the pressed flowers on matte art paper in the design and pattern you desire.
Compared to regular glue, PVA glue is more durable and non-damaging for porous materials, such as pressed flowers. Also, if you prefer, you can forego the matte art paper and use the same absorbent paper in which you pressed the flowers as your background display. Simply use the PVA glue to secure the flowers onto that paper and then frame the display for an instant wall hanging or tabletop art.
But that’s not all. Forever flowers can be used in a wide range of other cool art projects. Check out some fun ideas for using pressed flower art below:
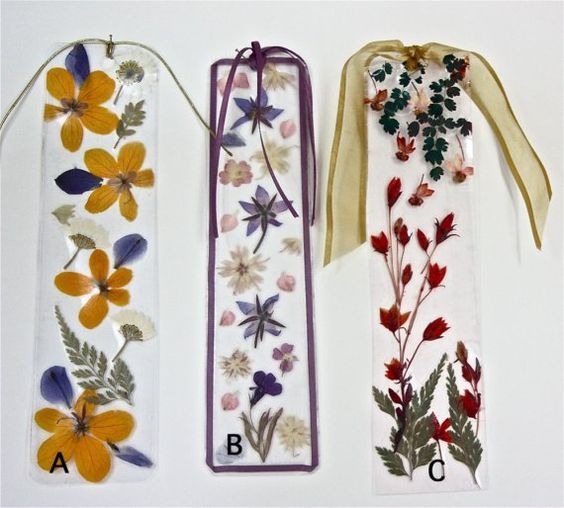
- Bookmarks: jazz up your plain bookmarks by gluing your favourite pressed flowers on them.
- Writing paper: Instead of regular letterheads, use pressed flower art as decor on your writing or letter paper for a unique design.
- Book covers: Don’t waste hundreds of dollars on a book illustrator while you have forever flowers lying around. Pressed flowers make for spectacular, eye-catching book covers. Alternatively, you can use them on your scrapbooks, journals, DIY photo albums, or a personal recipe collection book.
- Paperweights: Use forever flowers to make regular paperweights more visually attractive. Pressed flowers easily adhere to most types of paperweight material, even marble.
- Candles: After crafting or purchasing your candles, attach pressed flowers for that added artistic visual appeal.
- DIY lanterns: Attach your favourite forever flower onto a plain or frosted glass jar, mason jar, or small vase. Secure the flower with sisal string and place a small candle or tea light candle inside to create an instant lantern.
- Placemats and coasters: Pressed flower art also works on placemats and coasters, but only put them on placemats and coasters that you don’t plan on using with liquids.
- Jewellery with framed pendants: Take your favourite flower with you anywhere by adding them to your jewellery. Simply frame the flowers on a pendant and attach it to your necklace or bracelet. This type of art only works for smaller flower varieties, such as baby’s breath, though.
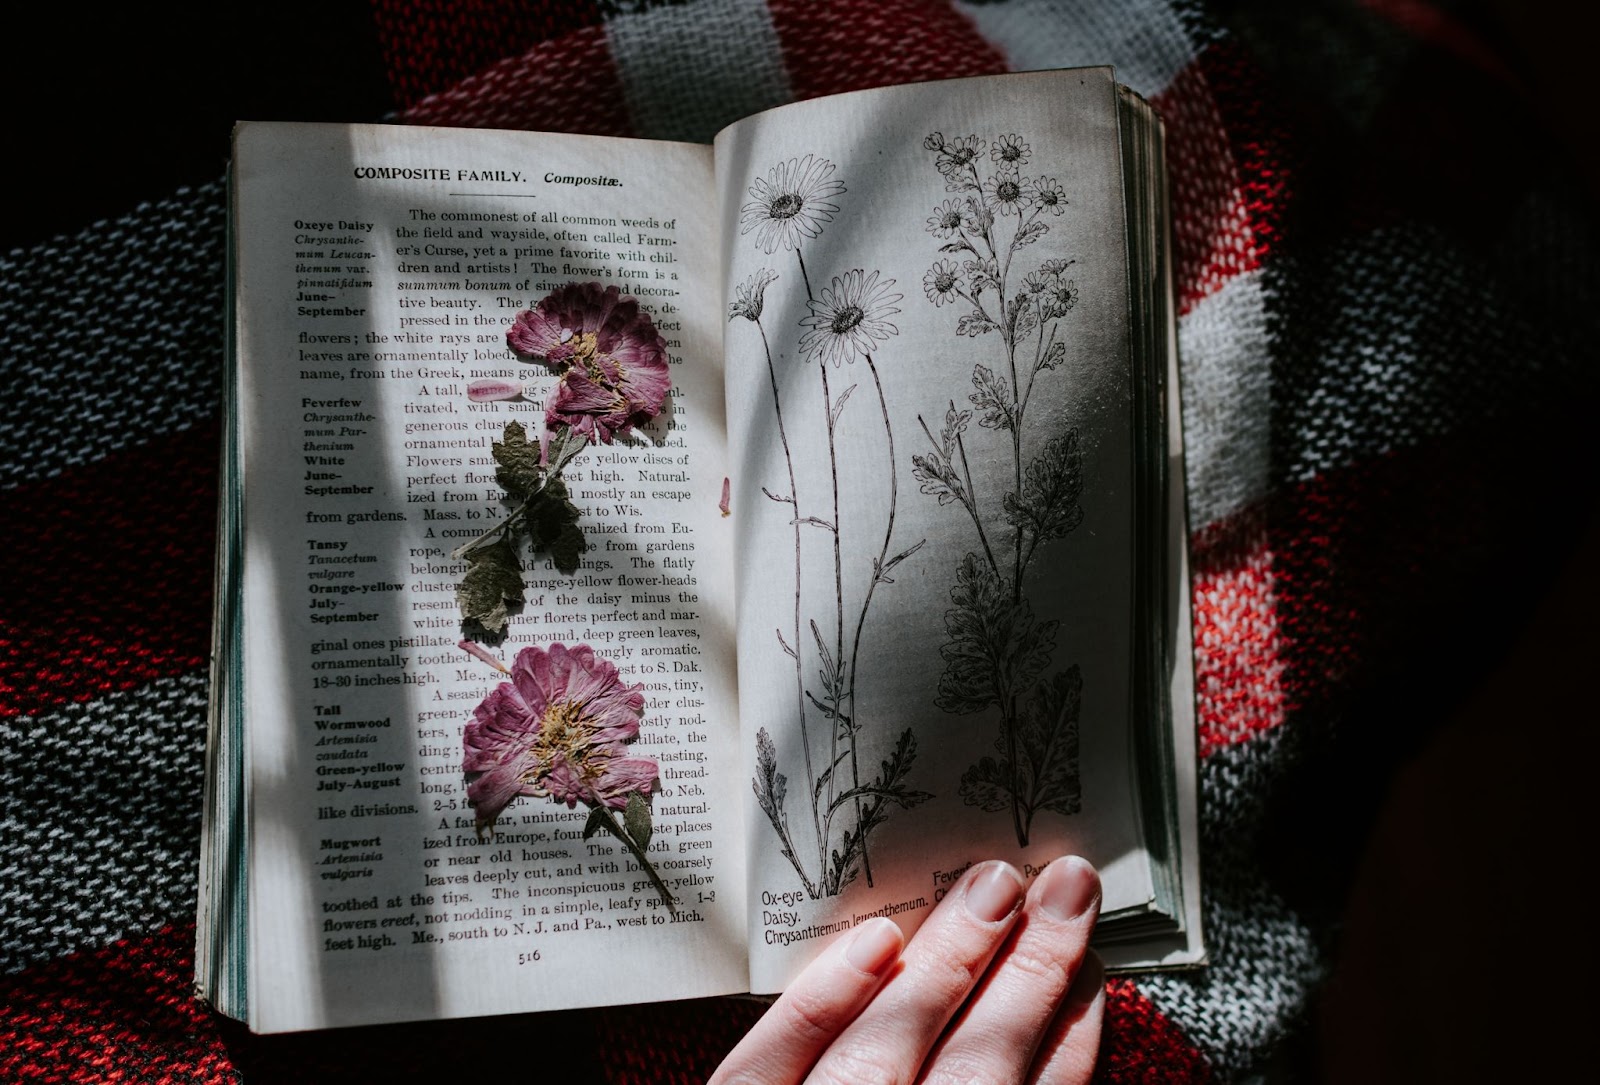
You can also use pressed flower art for more non-ornamental purposes, including the following:
- Educational material: Forever flowers can serve as an educational guide for both younger learners and adults alike by helping them to identify different flowers.
- Personal memorabilia: You can also collect and document the plants that you love or grow in your garden, or that you’ve received as a gift.
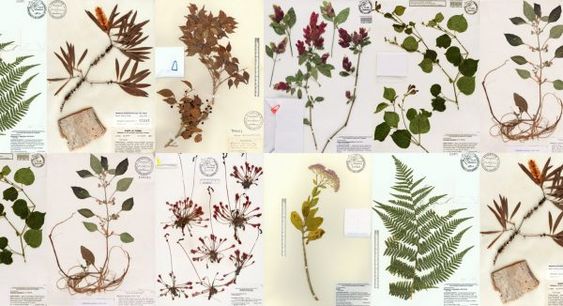
- Exhibition pieces: You can hold solo or group exhibitions of your pressed art collection. And who knows, they may one day even find their way into a museum. The most prominent and largest herbarium is the Natural History Museum in Paris with over 9 million pressed flower specimens collected from countries across the world. These collections aren’t just for show; instead, they’ve significantly contributed to providing vital information about plant history, habits, and biodiversity.
Source: Pinterest
If you plan on creating forever flowers for the above purposes, go for more durable paper such as herbarium sheets, instead of regular absorbent papers. Herbarium sheets are a higher quality paper specially designed for collecting and documenting plant specimens. They guarantee the longevity and proper preservation of your pressed flowers.
Additionally, if you want to press flowers for educational or documentation purposes, the pressing method you use matters. For this purpose, every part of the flower that holds important identifying features, including its stems and leaves, needs to be displayed. This means that you will have to press several flowers of the same variety to display them on multiple sides and also clearly label each side of the flowers.
Tips and Reminders for Forever Flowering
Not All Flowers Are Created Equal
Selecting the right flowers significantly impacts the overall pressing results. Thinner-petaled flowers dry easier and preserve their colours better than thick or multi-petaled flowers. But, in addition to the size, the flower’s natural colour plays a role, too. For instance, lighter/pale, white or bright colour flowers tend to fade faster upon pressing compared to flowers with neutral or mid-tone colours.
Further, you should pick your flowers based on the end product you wish to achieve. For example, framed forever flower art looks the best when you use smaller flowers compared to larger ones.
If you are just starting out in this hobby, pick flowers that are easier to work with and continue to experiment with different flowers as you get used to the craft. The best flowers to start pressing include daisies, pansies, and geraniums. As you continue to practise pressed flower art, you will also notice how you can capture important visual details.
Daisies, for example, look better when their heads come in complete contact with the surface of the absorbent paper, while blue bell tulips and larkspurs look best when positioned on their side to highlight their equally attractive side profiles. You can find lovely bouquets of tulips on their own on mixed with other flowers at Flowers Across Melbourne.
Additionally, you can incorporate thicker and larger flowers once you master flower pressing. For instance, you can cut roses in half to press them easily before using them in your art. However, not all thick flowers are ideal. Varieties, such as bluebells or begonias, are not suitable at all for forever flowering due to their long and demanding drying nature, and the fact that they mould very easily.
Pressing at the Right Time
Pressing your flowers at the right time is just as important as picking the right variety. Ideally, you should pick and press your flowers of choice at the peak of their bloom. During this time, they are in their best condition, including containing the highest colour pigment concentration; therefore, you’re guaranteed to preserve most of their colours and achieve greater longevity.
On the other hand, choosing wilted flowers or when they’re outside their peak bloom period increases the likelihood of quicker fading.
Getting the Best Results
- If you’ve bought or picked flowers but aren’t pressing them right away, preserve them in a vase filled with fresh water for a few days until you’re ready to use them. Cut the flower stems at an angle for easier water uptake and before you add them to the water, make sure no leaves or any other plant material are submerged below the water line. This prevents the water from becoming slimy or developing odour and losing its freshness. But don’t keep the flowers for long until they wilt or get damaged – this will affect the quality and look of the finished product.
- As outlined in the step-by-step guidelines, flowers dry or press better and quicker in warm and dry environments, such as near a heating boiler or radiator.
- After pressing your flowers, avoid placing them in an area exposed to direct sunlight. UV rays damage the colour pigments in flower petals, causing pressed flowers to fade rapidly and change in colour.
- If you are creating forever flowers for ornamental use, you can preserve the colour by applying a fixative, such as PVA or hair spray. Spraying a fixative on flower petals builds a thin coat that protects the flower’s colour from heat, light, and other damaging factors. Exercise extra caution when applying the fixative as too much of it can cause the flower to build up moisture and undermine its purpose.
- Continue protecting pressed flowers even after the drying process. Proper storage is one of the best ways to preserve the longevity of the flowers post-pressing. It’s important to store the flowers in a dry and well-ventilated area to prevent moisture or mould build-up.
- If you are creating framed art, place the flowers under glass to protect them from oxygen and other elements. Alternatively, depending on the art, you can also store pressed flowers in an airtight container with silica gel. You can do the same for unused pressed flowers to prevent them from re-accumulating moisture.
Forever Flowering FAQs
Where Did Forever Flower Art Originate?
The art of pressed flowers can be traced back to ancient Egypt. Over the years, it has also been enjoyed, practised, and showcased in Japan during the 1500s, where it was known as Oshibana. And, once trade between England and Japan was established, pressed flower art also became extremely popular during the Victorian era where they were showcased in flower vases, used on book covers, and even for memory preservation.
How Do Forever Flowers Keep Their Colour?
Forever flowers keep their colours when they are effectively dried and stored in a dry and non-damp area. But, the type of flower you chose and the stage of its maturity also matters. For example, smaller flowers with mid-tone colours tend to preserve their colours for longer.
How Long Do Forever Flowers Keep Their Colour?
Forever flowers can keep their colour for anywhere between a year and three years. However, you have to consider the contributing factors, such as the type of flower, its colour, pressing technique, and proper storage.
Why Are My Forever Flowers Turning Brown?
Forever flowers usually turn brown as a result of high moisture content. This typically happens when you attempt to press wet flowers or use an unsuitable method to press thick flowers. This leads to the flowers turning brown and ultimately developing mould.
How Long Do Forever Flowers Last?
Forever flowers can last you a lifetime when pressed properly using ideal tools. It is also essential to store the forever flowers in ideal conditions, avoiding damp and humid environments.
Closing
Forever flowers are a fun and creative way of displaying your favourite flowers for many years to come. They make unique and meaningful mementoes and can even serve as helpful markers of history for future generations!
If you enjoy DIY, you can also explore your skills by building a press and creating art with flowers. Or, if you just want to enjoy the process of pressing flowers without drilling or assembling anything, there are also many other options for creating forever flowers that produce beautiful results.
So, whether you want to decorate your home or you have a loved one’s birthday coming up, forever flowers may be exactly what you need. You could even arrange to host a fun pressed flower art session for everyone. Let your imagination run free and have fun creating your forever flowers with, and for your friends and family.
For the freshest flowers and reliable same-day delivery, check out Flowers Across Melbourne today.
No Comments